Overheating GPUs don’t “just run hot”-they throttle, crash, and can slowly cook VRAM and power stages, turning a $600 card into a loud space heater with stutters.
After servicing and repasting dozens of gaming and workstation GPUs-often ones “cleaned” with the wrong solvent or over-tightened screws-I’ve seen neglected thermal paste add 10-25°C and wipe out hours of productivity through instability, failed renders, and avoidable RMAs.
This article shows the exact, safe process to tear down your card, remove old compound without damaging pads or components, apply the correct amount of paste, and reassemble with proper pressure and screw order.
Result: lower temps, quieter fans, restored boost clocks, and reliable performance-without guesswork.
GPU Thermal Paste Replacement Checklist: Tools, ESD Safety, and Tear-Down Prep to Avoid Stripped Screws and Damaged Pads
A single stripped M2.5 heatsink screw can turn a 20‑minute repaste into a full teardown with a drilled standoff, and one torn VRAM pad can spike hotspot temps by 10-20°C. Prep the bench like you’re doing rework, not a quick “paste swap.”
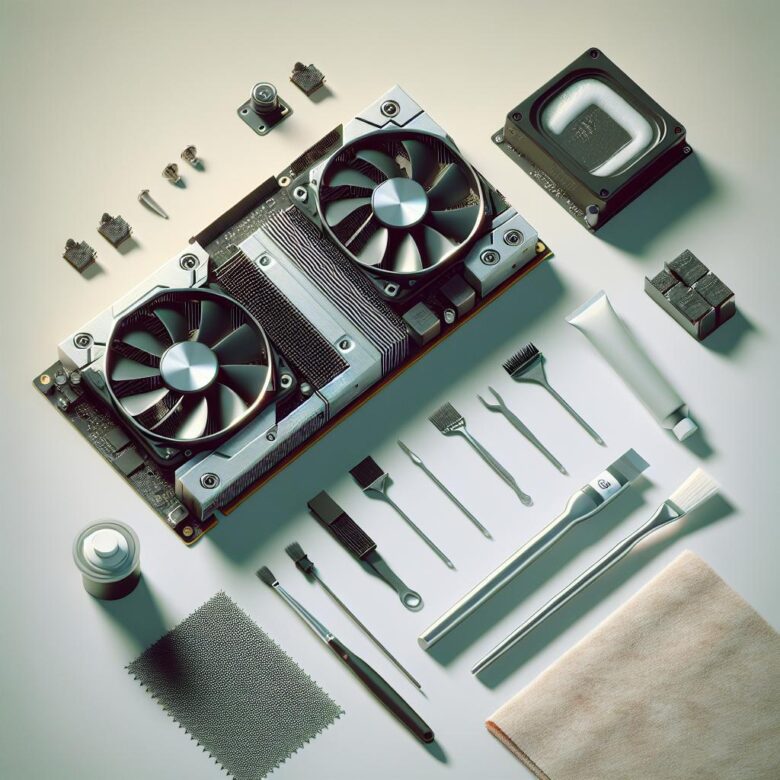
- Tools & verification: JIS #0/#00 or precision Phillips bits (Wiha/Wera), plastic spudger, angled ESD tweezers, 90-99% IPA + lint-free wipes, calipers for pad thickness, and HWiNFO to log GPU core/hotspot and VRAM temps before/after.
- ESD & handling: Grounded wrist strap or ESD mat, discharge the PSU, remove jewelry, handle the PCB by edges, and never drag the board over fabric; keep screws in labeled trays (backplate vs. shroud vs. heatsink lengths can differ by 1-2 mm and puncture traces).
- Tear-down prep: Photograph each layer, map screw locations, pre-warm the card (5 minutes of idle heat) to soften factory paste, and separate heatsink evenly-don’t “hinge” the cooler or you’ll shear pads; measure and stage replacement pads before lifting anything.
Field Note: I recovered a “dead after repaste” RTX card where a longer backplate screw shorted a VRM pad-matching screw lengths from photos and torqueing in a cross pattern fixed boot and dropped hotspot 14°C.
Step-by-Step GPU Repaste & Heatsink Cleaning: Removing Old Compound, Correct Solvent Use, and Bare-Die Contact Tips for Lower Temps
Most “bad paste” GPU hotspots are actually poor bare-die contact from uneven screw torque or dried pads holding the heatsink off by fractions of a millimeter. A correct repaste commonly drops edge-to-hotspot delta by 5-15°C, which you can verify with HWiNFO after reassembly.
| Step | What to Do | Why It Matters |
|---|---|---|
| Remove old compound | Warm the card briefly (1-2 min load), then wipe bulk paste with lint-free swabs; finish with 90-99% isopropyl alcohol on the die and cold plate. | Warm paste lifts cleanly; high-purity IPA evaporates fast and leaves minimal residue. |
| Correct solvent use | Use IPA only on metal and silicon; avoid soaking near SMDs/VRM, and never use acetone on plastics, stickers, or acrylic shrouds. | Limits solvent wicking under components and prevents cosmetic/structural damage. |
| Bare-die contact | Apply a small central dot (or thin spread for very viscous pastes), reinstall heatsink, tighten screws in an X-pattern in 2-3 passes. | Ensures flat seating; staged cross-torque prevents die corner lift and hotspot spikes. |
Field Note: After a “repaste” that still throttled at 110°C hotspot, I found one VRAM pad 0.5 mm too thick preventing contact-swapping to correct thickness and re-torquing in an X-pattern cut hotspot by 18°C.
Paste vs. Pads vs. Putty on Modern GPUs: Choosing Materials, Applying the Right Thickness, and Troubleshooting Hotspots After Reassembly
Most post-repaste “bad paste” complaints are actually contact-pressure or thickness errors: a 0.2-0.4 mm gap mistake can add 10-20°C delta on hotspot while edge temps look normal. Modern GPUs often need a mix of paste (die) plus pads or putty (VRAM/VRM), not a single material everywhere.
- Paste (GPU die): Use a thin, fully compressible layer; aim for complete wetting without squeeze-out onto SMDs. If hotspot stays high but core temp seems fine, you’re likely seeing uneven mounting or a dry/too-thick layer-verify with HWiNFO “GPU Hot Spot” delta (target typically <15°C under steady load).
- Pads (VRAM/VRM): Thickness is everything-measure the stock pad with calipers and match it; too thick bows the cooler and lifts off the die, too thin starves memory of contact. Replace pads in the same thermal zones (don’t mix random hardness/shores on one bank).
- Putty (VRAM/VRM gaps): Best for irregular heights; apply as uniform “beads” and let compression set final thickness. Avoid overpacking-excess putty can hydraulically jack the heatsink and spike hotspot.
Field Note: After a 3090 reassembly showed a 28°C hotspot delta, swapping 2.0 mm VRAM pads to the measured 1.5 mm and re-torquing in a cross pattern immediately normalized contact and dropped hotspot by 14°C.
Q&A
Q1: How do I know when my GPU thermal paste needs to be replaced, and how often should I do it?
Replace thermal paste if you see higher core temperatures than usual (often +10-20°C under similar loads), more frequent thermal throttling, or fans ramping harder without a performance gain. As a general guideline, repaste every 2-5 years, sooner for GPUs that run hot, are heavily overclocked, or used in 24/7 workloads. Always confirm with monitoring: compare current temps, clocks, and fan speeds against your earlier baseline if available.
Q2: What’s the correct way to clean off old thermal paste on a GPU, and what should I avoid?
Use 90-99% isopropyl alcohol and lint-free wipes (or coffee filters). Gently wipe the GPU die until it’s clean and residue-free; for stubborn paste, let alcohol soak briefly, then wipe again. Clean the heatsink contact plate the same way.
- Avoid metal tools (risk of scratching the die or contact plate).
- Avoid paper towels (can shed fibers) and “wet” household cleaners.
- Don’t flood the PCB with liquid; use controlled amounts on the wipe or swab.
- Be careful around thermal pads-don’t tear or misplace them; pad condition and thickness matter for memory/VRM contact.
Q3: What thermal paste should I use, how much should I apply, and do I need to replace thermal pads too?
Choose a reputable, non-conductive paste (most mainstream options are). Apply a small, centered amount-typically a pea-sized dot for common GPU dies-then reinstall the cooler with even pressure; the mounting force spreads the paste. Too much paste can spill over edges and make a mess; too little can leave gaps and raise temps.
- Thermal pads: Replace them only if they’re torn, brittle, oil-soaked, or no longer making good contact. If you replace pads, match the exact thickness (e.g., 1.0 mm, 1.5 mm, 2.0 mm) required by your specific GPU model to avoid poor core contact or overheating components.
- Reassembly tip: Tighten screws in a crisscross pattern to ensure uniform pressure across the GPU die.
Summary of Recommendations
Pro Tip: The biggest mistake I still see is “over-cleaning”-scraping the die, flooding the PCB with solvent, or overtightening the cooler. Use 90%+ isopropyl sparingly, keep it off the fan bearings, and tighten screws in a cross pattern to the stop (not past it). If hotspot temps stay high after a repaste, don’t keep redoing paste-suspect uneven mounting pressure or worn VRM/VRAM thermal pads instead.
Before you power back up, take one minute to validate your work.
- Open HWiNFO (or GPU-Z) and log GPU Core, Hotspot, and Fan RPM for a 10-minute load.
- Save the log with today’s date so you have a baseline for future drift.

Leo Sterling is a dedicated hardware analyst and PC building veteran with over a decade of experience in the semiconductor industry. As the lead editor of GPU Pulse, Leo specializes in real-world benchmarking and silicon architecture. Having built his first gaming rig during the golden age of 1080p, he now focuses on the intersection of AI-driven upscaling and high-refresh-rate gaming. When he’s not analyzing frame timings or undervolting the latest flagship cards, Leo can be found experimenting with custom water-cooling loops and mentoring new builders in the community.