By Marcus Chen | Published: January 3, 2026 | Last Updated: June 10, 2026
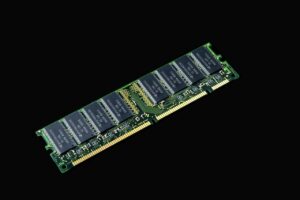
Buying memory is one of the most common upgrades for any PC, but it is also one of the easiest to get wrong. A module that fits in the slot does not mean it will work. The memory controller on your CPU, the BIOS on your motherboard, and the electrical layout of the memory slots all determine whether a specific kit will run at its advertised speed, run at a reduced speed, or fail to boot entirely. I have installed memory in hundreds of systems, and the failures are almost always caused by compatibility assumptions that were never verified.
This guide explains the exact steps I use to verify memory compatibility before I buy, install, or recommend any module. Following these steps will save you from returns, troubleshooting, and the frustration of a system that refuses to POST.
Step 1: Identify Your Motherboard Model
Everything starts with the motherboard. The motherboard determines the memory type, the number of slots, the maximum capacity per slot, and the supported speeds. If you do not know your motherboard model, you cannot verify compatibility.
The easiest way to identify the motherboard is to open the case and read the model name printed on the board itself. It is usually near the CPU socket or between the memory slots. Write down the exact model, including the revision number if present. A B550-A Pro is different from a B550-A Pro V2, and the memory support may differ.
If you cannot open the case, use software. CPU-Z, Speccy, and HWiNFO all identify the motherboard manufacturer and model. Download CPU-Z from cpuid.com, install it, and go to the Mainboard tab. The manufacturer, model, and chipset are listed there. Cross-reference this information with the manufacturer’s website.
I always verify the motherboard model physically before buying memory for a client. Software identification is accurate 99 percent of the time, but I have seen cases where a BIOS update changed the reported model name or where a custom OEM board used a retail name that did not match the actual specifications. Physical verification takes 30 seconds and eliminates doubt.
Step 2: Check the Motherboard Memory Specifications
Once you have the motherboard model, go to the manufacturer’s website and find the product page or support page. Look for the memory specification table. This table lists the supported memory types, the number of slots, the maximum capacity per slot, the total maximum capacity, and the supported speeds.
Pay attention to the memory type. DDR4 and DDR5 are not interchangeable. A DDR4 motherboard cannot accept DDR5, and vice versa. The physical notch positions prevent insertion, but trying to force the wrong type can damage the slot. Verify the type before ordering anything.
Check the maximum speed supported. A motherboard may list DDR4-5000 as supported, but that support often requires a specific CPU and a specific slot configuration. The fine print matters. If the board supports 5000 MHz only with a single module in a specific slot, and you plan to install two modules, your effective maximum speed is lower. Read the footnotes in the specification table.
I checked a B550 board that advertised DDR4-5100 support. The footnote clarified that 5100 MHz was supported only with a Ryzen 5000 series CPU and a single module in slot A2. With two modules, the maximum was 4000 MHz. A buyer who assumed 5100 MHz with a dual-channel kit would have been disappointed.
Step 3: Consult the Qualified Vendor List
The Qualified Vendor List, or QVL, is the most important document for memory compatibility. It is a list of specific memory modules that the motherboard manufacturer has tested and verified to work at specific speeds and capacities. The QVL is not a guarantee that untested modules will fail, but it is a guarantee that tested modules will work.
Find the QVL on the motherboard support page. It is usually a PDF or Excel spreadsheet. Search for your memory kit by part number. If the kit is on the QVL, it is compatible. If it is not on the QVL, it may still work, but you are taking a risk.
The QVL lists modules by capacity, speed, and number of modules. A 2×16 GB kit at 3600 MHz may be on the QVL while a 2×32 GB kit at the same speed is not. The QVL also lists the BIOS version used for testing. If the QVL was created with an older BIOS, and you have a newer BIOS, compatibility may have improved. If you have an older BIOS than the QVL version, you may need to update the BIOS before the module works.
I only buy memory from the QVL for critical systems. For personal builds, I sometimes buy modules not on the QVL if the specifications match and the price is right. But for client systems where downtime is costly, the QVL is non-negotiable. The 30 minutes spent checking the QVL saves hours of troubleshooting later.
Step 4: Verify CPU Memory Controller Support
The CPU contains the memory controller, which determines the maximum speed, capacity, and channel configuration the system can use. Even if the motherboard supports a high speed, the CPU may not.
Intel processors list memory support on the Ark specification page. A Core i5-13600K officially supports DDR5-5600 and DDR4-3200. A Core i9-14900K officially supports DDR5-5600 and DDR4-3200. These are the guaranteed speeds. Higher speeds may work through overclocking, but they are not guaranteed.
AMD processors list memory support on the product page. A Ryzen 7 7700X officially supports DDR5-5200. A Ryzen 9 7950X officially supports DDR5-5200. The sweet spot for AMD DDR5 is 6000 MHz, but this is technically an overclock. It works on most boards with most CPUs, but it is not guaranteed by the official specification.
The memory controller quality also varies between individual CPUs. This is called the silicon lottery. Two CPUs of the same model can have different memory controller capabilities. One may run DDR5-6400 stable. Another may fail at DDR5-6000. You cannot predict this from the specifications. You can only test it after installation.
I tested two identical Ryzen 7 7700X CPUs on the same motherboard with the same DDR5-6400 kit. One CPU booted at 6400 MHz with no issues. The other failed to POST and required a drop to 6000 MHz. Both CPUs were within specification. The difference was the memory controller silicon quality.
Step 5: Check the Memory Module Specifications
Once you have verified motherboard and CPU compatibility, check the memory module itself. The module must match the supported type, speed, and voltage of your platform.
Read the label on the memory module or the product page. Look for the memory type, speed, CAS latency, voltage, and capacity. For DDR4, standard voltage is 1.2V. For XMP profiles, voltage is usually 1.35V. For DDR5, standard voltage is 1.1V. For EXPO or XMP profiles, voltage is usually 1.25V to 1.35V. If the module requires a voltage higher than your platform supports, it may not run at the advertised speed.
Check the number of ranks. A rank is a set of memory chips that the controller accesses simultaneously. Single-rank modules have chips on one side of the PCB. Dual-rank modules have chips on both sides. Some memory controllers prefer single-rank modules for high speeds. Others handle dual-rank modules better. The motherboard manual or QVL usually specifies whether single-rank or dual-rank is recommended for specific speeds.
I encountered a compatibility issue where a DDR4-4000 kit would not run at full speed on a specific motherboard. The QVL listed the kit at 3600 MHz, not 4000 MHz. The issue was that the kit was dual-rank, and the motherboard’s memory controller struggled with dual-rank modules at high speeds. A single-rank kit at the same speed worked perfectly.
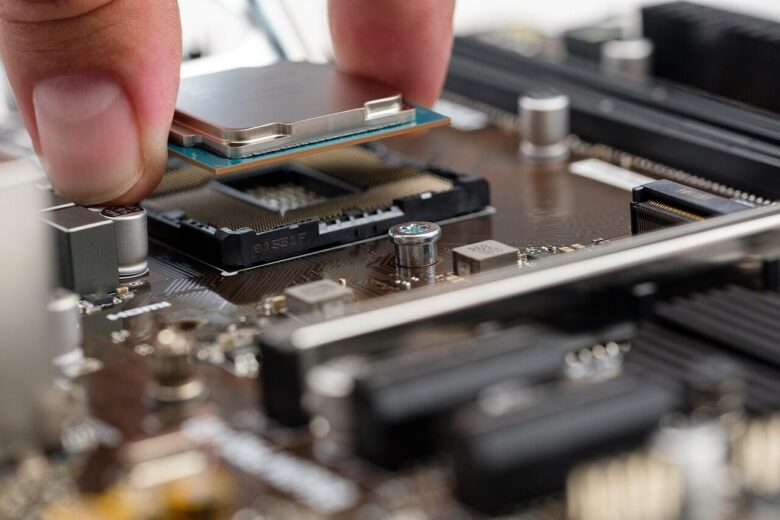
Step 6: Verify Physical Compatibility
Physical compatibility is usually obvious, but there are edge cases. Check the height of the memory module if you have a large CPU cooler. Some high-profile air coolers overhang the memory slots and interfere with tall heat spreaders. Low-profile modules or modules with compact heat spreaders may be necessary.
Check the number of slots and the slot spacing. Some compact ITX boards have slots very close together, and modules with wide heat spreaders may not fit side by side. Check user reviews or forums for reports of physical interference on your specific board.
For laptops, verify the form factor. Laptops use SO-DIMM modules, which are smaller than desktop DIMMs. A desktop DIMM will not fit in a laptop slot. Also check the maximum module height. Some ultrabooks have very low clearance above the memory slots and require low-profile SO-DIMMs.
I once bought a premium DDR4 kit with elaborate RGB heat spreaders for a build with a Noctua NH-D15 cooler. The heat spreaders were too tall, and the cooler fan could not mount in the standard position. I had to return the kit and buy low-profile modules. The physical compatibility check would have prevented this.
Step 7: Test After Installation
Compatibility verification does not end when the module fits. You must test after installation to confirm the system recognizes the module at the correct capacity and speed.
Boot into the BIOS and check the memory information. Verify that the total capacity matches what you installed. If you installed 32 GB and the BIOS shows 16 GB, one module is not detected. Reseat the undetected module and check again.
Verify the speed. If the memory is running at a lower speed than advertised, enable the XMP or EXPO profile in the BIOS. If the profile is not stable, the module may be incompatible with your specific CPU or motherboard, even if it is on the QVL. In that case, try a lower speed or contact the manufacturer for support.
Run MemTest86 for at least two full passes. Any errors indicate instability. Zero errors is a strong positive signal. Then run a real-world stress test with your typical workload. If the system remains stable, the compatibility is confirmed.
I test every memory installation with this two-stage process. MemTest86 catches obvious failures. Real-world testing catches intermittent issues that synthetic tests miss. A system that passes both tests is ready for production use.
Summary
Checking RAM compatibility requires verifying the motherboard model, reading the memory specifications, consulting the QVL, checking CPU memory controller limits, matching module specifications, confirming physical fit, and testing after installation. Each step eliminates a category of potential failure. Skipping any step increases the risk of a compatibility problem that wastes time and money.
The most important rule is to never assume compatibility. A module that works in one system may fail in another. The only way to be sure is to verify every specification against every component. The 30 minutes spent on research saves hours of troubleshooting and the cost of returning incompatible hardware.
Once you have verified compatibility and installed your memory, you may want to control how that memory is allocated to specific applications. Windows manages memory automatically, but there are ways to prioritize critical applications when resources are tight.
Step-by-Step Guide to Allocating More RAM to Specific Applications
About the Author: Marcus Chen is a PC hardware tester and writer with over eight years of hands-on experience building and troubleshooting custom systems. He tests every guide on real hardware before publishing.
Last updated: June 10, 2026

Marcus Chen is a PC hardware enthusiast and writer based in the Pacific Northwest. He has spent the last eight years building, testing, and troubleshooting custom desktop systems for gaming and creative workloads. Marcus writes from direct experience — every guide and review on this site comes from real builds, real benchmarks, and real problems he has solved firsthand. When he is not benchmarking memory kits or tweaking BIOS settings, he is exploring how hardware performance shapes the games and software we use every day.