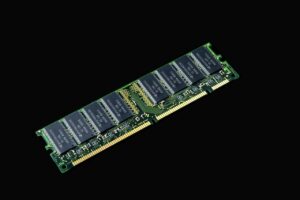
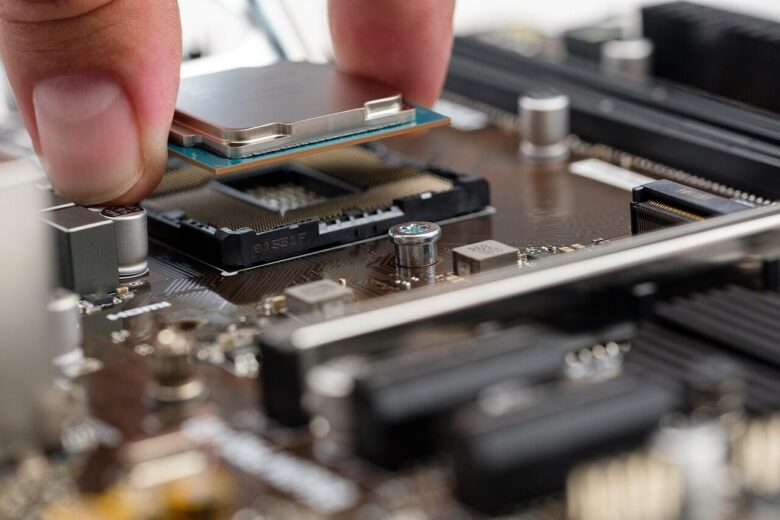
RAM compatibility depends on more than whether a module fits into a motherboard slot. The motherboard determines the supported memory generation and physical format, while the CPU’s integrated memory controller affects capacity, speed, and stable configurations. BIOS support, module layout, and the number of installed DIMMs can also change the result.
Before ordering memory, verify the exact motherboard, CPU, kit part number, and intended slot configuration. These checks reduce the risk of failed boot attempts, reduced speeds, instability, and unnecessary returns.
1. Identify the Exact Motherboard Model
Start with the motherboard’s complete model name. Similar-looking boards can support different capacities, BIOS versions, or memory layouts. Include the revision number when one is printed on the board; a later hardware revision may have a separate support page or qualified memory list.
The model is usually printed near the CPU socket, PCIe slots, or memory slots. If opening the computer is not practical, utilities such as CPU-Z or HWiNFO can report the board manufacturer and model. Windows users can also open System Information and inspect the baseboard fields, although prebuilt systems do not always report them clearly.
Software results should be compared with the manufacturer’s support page. This is especially important for computers from major system vendors because an OEM motherboard may differ from the similarly named retail version. For a prebuilt PC or laptop, use the computer’s service tag or full system model to locate the appropriate documentation.
2. Read the Motherboard Memory Specifications
The motherboard product page and manual should identify the basic memory requirements:
- DDR generation, such as DDR4 or DDR5
- Desktop DIMM or laptop SO-DIMM format
- Number of memory slots
- Maximum total capacity and, where specified, maximum capacity per slot
- Supported speeds under standard and overclocked profiles
- Support for ECC, non-ECC, registered, or unbuffered memory
- Recommended slots for one-, two-, and four-module configurations
DDR4 and DDR5 are not interchangeable. Their notch positions and electrical designs differ, so a DDR5 module cannot be used in a DDR4 slot or vice versa. Do not force a module that does not align with the slot.
Capacity limits also matter. A board with four slots does not necessarily support every four-module combination. Older motherboards may not recognize newer high-density modules, even when the advertised total capacity appears sufficient. Check both the maximum total capacity and any restrictions on individual DIMM sizes.
Memory speeds are commonly marketed using effective transfer rates, such as DDR5-6000, and are often informally described in MHz. The maximum speed printed on a motherboard box may apply only under particular conditions. CPU generation, BIOS version, module rank, and the number of populated slots can all affect the achievable setting. Read the specification footnotes rather than relying only on the highest advertised number.
3. Check the Qualified Vendor List
A motherboard’s Qualified Vendor List, usually abbreviated QVL, records memory configurations that the manufacturer validated during its testing. It can often be found under the support, compatibility, or downloads section of the motherboard’s product page.
Search the list using the complete kit part number, not just the brand and speed. A manufacturer may sell several kits with similar names but different capacities, timings, memory chips, or module counts. For example, validation of a two-module kit does not automatically extend to a four-module configuration from the same product family.
When reading a QVL, compare the following details:
- Exact memory kit or module part number
- Total capacity and capacity per module
- Number of DIMMs used during validation
- Validated speed and timings
- CPU generation or processor family, if listed
- BIOS version associated with the test
A QVL entry is useful evidence that the listed configuration was tested, but it is not an unconditional guarantee. Results may differ with another processor, BIOS release, or slot population. Conversely, absence from the QVL does not mean a kit is incompatible. Manufacturers cannot test every memory product, and newer kits may have been released after the list was created.
Some memory manufacturers also publish compatibility tools. Checking both the motherboard QVL and the memory vendor’s configurator provides more information, but the exact part number and configuration still need to match.
4. Verify the CPU’s Memory Controller Limits
Modern desktop processors generally contain the memory controller. As a result, motherboard support alone does not determine the memory configuration that will work. Look up the exact CPU model on the processor manufacturer’s official product page and check:
- Supported DDR generation
- Official memory data rate
- Maximum memory capacity
- Number of memory channels
- ECC support, where relevant
Speeds above the processor’s official specification usually depend on XMP, EXPO, or manual overclocking. The motherboard may advertise those speeds, but stable operation is not assured for every processor and memory kit. Individual memory controllers can vary, and higher-capacity or heavily populated configurations place a greater electrical load on the controller.
This is why four modules may need to run more slowly than two modules, even when all four are individually compatible. Mixing kits can make the issue more complicated. Two kits with the same retail model name may use different internal components, and a pair of two-module kits is not necessarily equivalent to one factory-matched four-module kit.
5. Match the RAM Kit’s Specifications
Review the memory product page or label and compare it with the motherboard and CPU requirements. Important fields include the DDR generation, capacity, module count, rated transfer speed, timings, operating voltage, profile type, and error-correction features.
XMP and EXPO profiles
Many performance-oriented kits boot initially at a conservative standard setting. Their advertised speed is loaded by enabling an XMP or EXPO profile in the BIOS. XMP is commonly associated with Intel platforms, while EXPO is designed for AMD platforms, although actual profile support varies by motherboard and kit.
A profile is a preset overclocking configuration rather than a promise that every CPU and board will run it. If the profile is unstable, the practical options are to update the BIOS, reduce the memory speed, use looser timings, return to automatic settings, or choose a kit validated for the intended configuration.
Ranks and module organization
Single-rank and dual-rank modules can place different loads on the memory controller. Rank should not be determined solely by whether chips appear on one or both sides of the circuit board; chip placement and electrical rank are not always the same. Use the manufacturer’s technical specifications, the motherboard QVL, or hardware-reporting software when rank information is needed.
ECC and registered memory
ECC, non-ECC, registered, and unbuffered memory are not universally interchangeable. Registered DIMMs used in servers generally cannot be installed in standard consumer motherboards. ECC support may require a compatible CPU, chipset, motherboard design, and BIOS. Verify the entire platform rather than assuming that physical fit indicates support.
6. Confirm Physical Clearance and Upgrade Access
Desktop memory can conflict with large air coolers. Tall heat spreaders or RGB lighting may prevent a cooler fan from sitting in its intended position. Check the RAM height, the cooler’s memory-clearance specification, and whether raising the fan would interfere with the side panel.
Desktop motherboards normally use full-size DIMMs, while upgradeable laptops and compact systems commonly use SO-DIMMs. Some thin laptops have memory soldered directly to the motherboard, either instead of or alongside an upgrade slot. Consult the service manual before purchasing laptop RAM.
Also confirm that the computer can be opened without damaging clips, cables, or cooling components. On some laptops, replacing memory may require removing the battery connection first. Follow the manufacturer’s service instructions and warranty terms.
7. Install the Modules in the Correct Slots
For a two-module kit on a four-slot motherboard, the recommended slots are often A2 and B2, which are typically the second and fourth slots away from the CPU. This is common but not universal, so follow the motherboard manual.
Shut down the computer, disconnect power, and discharge residual power before installation. Align the module’s notch with the slot and press evenly until the retaining clips lock. If a module does not seat with firm, even pressure, stop and confirm its orientation and memory type.
A matched kit is preferable when installing multiple modules. Avoid combining different capacities, speeds, timings, or voltages unless the motherboard documentation explicitly supports the configuration. Mixed memory may operate at the settings of the slowest module, fall back to conservative defaults, or remain unstable.
8. Verify Detection and Stability
After installation, enter the BIOS and confirm that the full capacity is detected. If only part of the memory appears, turn off the system and reseat the modules. Testing one module at a time in a recommended slot can help distinguish a seating problem, faulty module, or problematic slot.
Check the reported memory speed before enabling XMP or EXPO. A lower initial speed is often normal because the motherboard starts with standard settings. Enable the appropriate profile only after confirming that the system boots correctly at defaults.
Run a dedicated memory test after changing the configuration. MemTest86 or another reputable bootable memory diagnostic can identify many faults that may not appear during ordinary startup. Multiple complete passes provide more confidence than a brief check, but no single test proves absolute stability. Follow with normal workloads and monitor for crashes, application errors, corrupted files, or unexpected restarts.
If errors appear, restore default memory settings first. Then reseat the modules, test each module separately, confirm the recommended slots, and review the BIOS version. A BIOS update may improve memory compatibility, but it should be performed according to the motherboard manufacturer’s instructions with stable power. Do not update the BIOS solely as a routine step if the system is already stable and the update is unrelated.
RAM Compatibility Checklist
- Confirm the exact motherboard model and hardware revision.
- Match the required DDR generation and DIMM or SO-DIMM format.
- Check total capacity, per-slot limits, and recommended slot placement.
- Look up the CPU’s official memory support.
- Search the motherboard QVL using the complete kit part number.
- Check whether the advertised speed requires XMP or EXPO.
- Prefer one matched kit instead of combining separate kits.
- Verify cooler clearance and laptop upgrade access.
- Confirm capacity and speed in the BIOS after installation.
- Test memory at default settings before troubleshooting an overclocked profile.
The safest choice is not necessarily the kit with the highest advertised speed. A suitable kit matches the platform’s memory generation, capacity limits, physical requirements, and realistic speed for the selected CPU and module count. Checking those details before purchase is more reliable than assuming that any module with the correct notch will work.
After confirming that the hardware is stable, application memory use can be reviewed separately. For related Windows guidance, see Step-by-Step Guide to Allocating More RAM to Specific Applications.
Sources and verification
For specifications and platform-specific details, verify the current documentation for your exact hardware and software version. The following official or manufacturer resources are useful starting points:
- Kingston — Memory Compatibility Finder
- Intel — Extreme Memory Profile (XMP)
- AMD — EXPO Memory Technology

ChinaGear Lab Editorial Team publishes source-based guides about PC memory, hardware compatibility, system upgrades, troubleshooting, and buying decisions. Our content focuses on documented specifications, manufacturer guidance, compatibility information, and clearly explained technical concepts.